
When it comes to updating the look of your home, one of the biggest transformations you can make is getting rid of that outdated popcorn ceiling. Popcorn ceilings, also known as acoustic ceilings, were once a popular design choice, but they can now make a space feel old and dingy. If acoustic ceiling removal to say goodbye to your popcorn ceiling and welcome a more modern aesthetic, you've come to the right place.
In this step-by-step guide, we will walk you through the process of removing your popcorn ceiling, whether you're located in Toronto or elsewhere. From finding reliable ceiling removal contractors to ensuring a smooth and textured ceiling removal process, we've got you covered. Let's dive in and help you transform your space by removing that textured ceiling for good.
Preparation
Before starting the popcorn ceiling removal process, it's essential to prepare the space properly. Begin by removing all furniture and covering the floors and walls with plastic sheeting to protect them from debris. Ensure proper ventilation by opening windows and using fans to minimize dust accumulation.
Next, gather the necessary tools and equipment for the job. This includes a spray bottle filled with water, a putty knife or taping knife, a ladder, and safety gear such as goggles, a dust mask, and gloves. Having the right tools on hand will make the removal process more efficient and safer.
Lastly, consider hiring professional ceiling removal contractors if you're unsure about tackling the project yourself. In Toronto, there are experienced professionals skilled in acoustic and textured ceiling removal who can ensure the job is done correctly and efficiently. Research and contact reputable contractors to get quotes and schedules for your project.
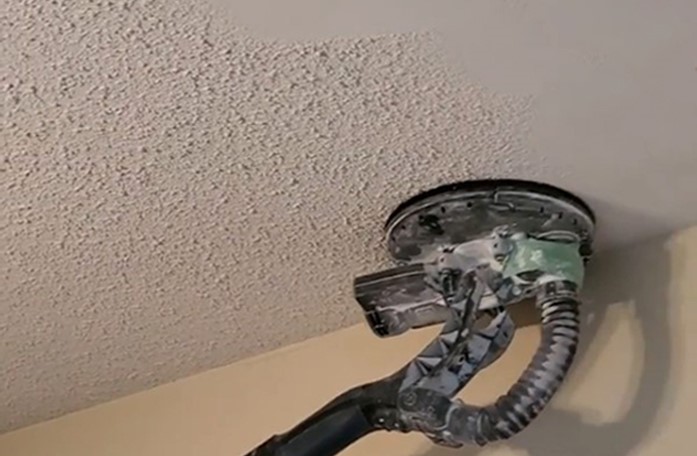
Removal Process
First, before starting the popcorn ceiling removal process, make sure to prepare the room by removing all furniture and covering the floors and walls with protective sheeting. This will prevent any debris from damaging your belongings or surfaces during the removal.
Next, it's important to dampen the ceiling surface before scraping off the popcorn texture. This helps to minimize the release of dust particles into the air. Use a spray bottle filled with water to lightly mist the ceiling, allowing the water to soak in for a few minutes before beginning the removal process.
Once the ceiling is adequately dampened, use a ceiling scraper or putty knife to gently scrape away the textured popcorn surface. Work section by section, taking care not to damage the underlying ceiling. After the majority of the texture is removed, sand down any remaining rough patches to create a smooth surface for finishing touches.
Hiring a Professional
When it comes to tackling popcorn ceiling removal, hiring a professional can offer significant advantages. Acoustic ceiling removal requires specialized skills and equipment that professional contractors are well-versed in. In Toronto, there are experienced ceiling removal contractors who can efficiently and safely handle the task, ensuring a smooth process from start to finish.
Popcorn ceiling removal can be a messy and time-consuming job, but with the help of professionals, the process can be streamlined. These contractors have the expertise to minimize dust and debris during the removal process, leaving your space cleaner and more comfortable. By enlisting the services of professionals in textured ceiling removal, you can save yourself the hassle and ensure a high-quality result.
If you're considering popcorn ceiling removal, the expertise of professionals in Toronto can make all the difference. From proper preparation to thorough cleanup, hiring a professional ensures that the job is done right. With their knowledge and experience, ceiling removal contractors can take on the task efficiently and effectively, turning your ceiling into a smooth, modern surface.